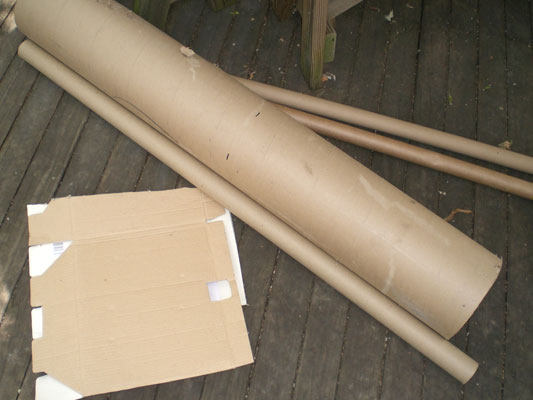
The raw materials which made up the tree were a bunch of thick cardboard tubes of varying thickness, and some cardboard sheets which would be used for the roots.
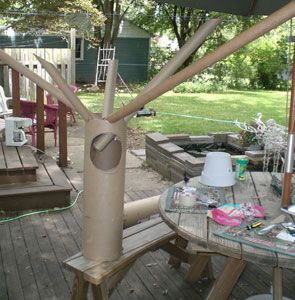
Since the tree could not be any taller than four feet at it's highest point, I tried to vary the length and angle of the branches in order to create the illusion of the tree having more height than it actually did. Here, I simply positioned the branches on the trunk, using a simple method of notching the branches, where they meet the trunk, with a box cutter and then slotting them onto the trunk..

After numbering the branches, and marking their locations, I screwed some wooden blocks onto the inside base of the trunk. A platform would later be screwed onto the base of the tree (anchored to these blocks). This platform would then be screwed down to the top of the archway in the store.
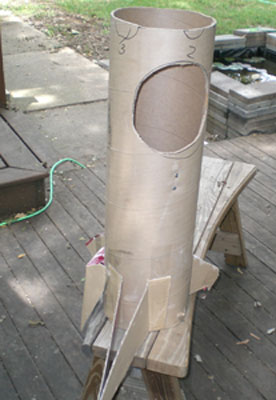
Next a hole was cut into the trunk where the raccoon would be placed. The two screws seen just below the hole mark where another wooden block was mounted inside. The raccoon will be mounted to this block.
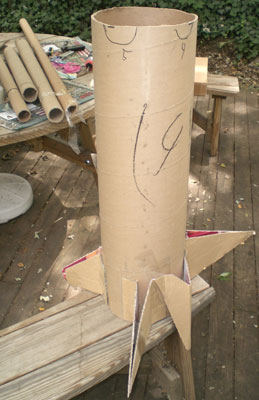
Frames for the roots were cut from cardboard boxes and affixed to the side of the trunk with packing tape. You can see the placement markings for each of the branches.

Before starting the paper mache process, I repositioned the branches one more time, in order to see if any of them interfered with the interior of the hole and where the raccoon would be placed. A couple of them were trimmed at the bottom to such a length that didn't compromise stability, but short enough that I could camouflage their presence later on.

Once again, the branches were removed and the trunk was paper mached. This of course meant that the numbered markers for the branches was no longer visible.
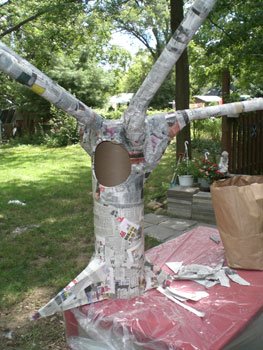
Thanks to digital photography, I was able to recreate the placement of the branches anyway, though I ended up repositioning them slightly anyway. These then were paper mached to the trunk. Wadded up pages of newspaper were paper mached beneath a couple of the branches where they meet the trunk in order to give them a more natural appearance. This tree was by no means meant to resemble a real tree, but even as a stylistic tree, the branches merely jutting out in their natural tube shapes seemed jarring, unnatural, and in no way disguised the elements from which they were created.


Once everything was paper mached, and dried, the tedious process of attaching the leaf stems began. The stems themselves were made from medium heavy florist wire (I don't recall the specific gauge). I cut the wire into roughly 4-inch lengths, and twisted an angled c-shaped curve at one end. This curve was then taped to the branch with masking tape and then covered with paper mache for strength and stability. Since this tree was stylistic, I decided to space them evenly around the branches. There were about 98 of these stems, so the work seemed somewhat endless.


No comments:
Post a Comment