At the same time I was working on the tree, I was also working on the creatures which would be inhabiting it. This included a raccoon, two birds, two bees and a hive, and an opossum.
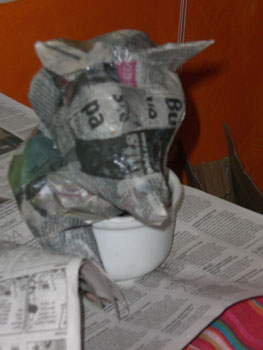
The raccoon ended up being pretty easy. I only had to build his head, arms, and upper torso, since he'd be emerging from the hole in the tree, resting on the rim as if he were leaning on a window sill watching the world going by around him.
For the paper mache I used a basic formula of boiling water, then adding in a diluted mixture of water and flour which was then heated until it became a thick paste. Once this cooled to room temperature, it was easy to work with. The newspaper was torn into strips of various length and used accordingly.
After the paper macheing was completed, everything had to be primed. This step also revealed any flaws in the paper macheing; areas where the newspaper had lifted, or created holes, or areas that just weren't smooth enough. This is why there are newspaper patches on the primed raccoon -- touch-ups, which were then primed before...
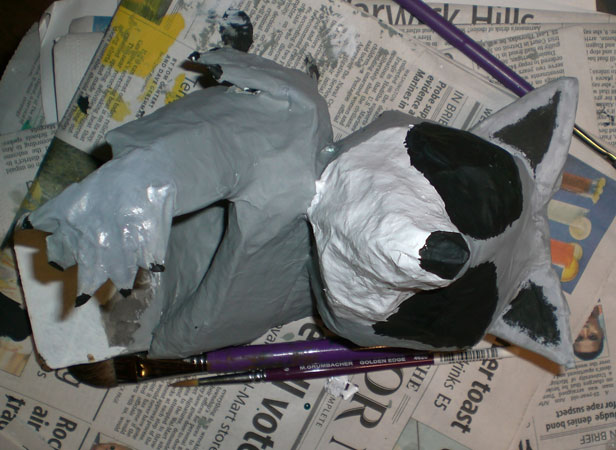
...the actual painting. Here's the painted raccoon before his eyes were added.

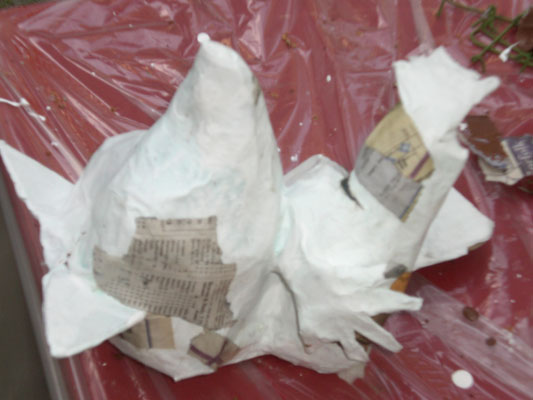
Here's the rough construction of the other tree animals. Left to Right: The opossum, two birds, bee hive, and bees. They were essentially balled up newspaper and masking tape, with cardboard accents. The opossum had a heavy gauge florist wire tail, and thinner wire for the hands which were added later in the process.
Sadly, this is one of the few images I have to offer of the basic construction stage of the characters created for this display. I took plenty of pictures of each stage of the others, but my son accidentally erased all of the pictures from our digital camera before I had a chance to download them onto my computer. The same process applied to most of the others. A frame was made of cardboard and newspaper, with wire as necessary, then covered with paper mache.
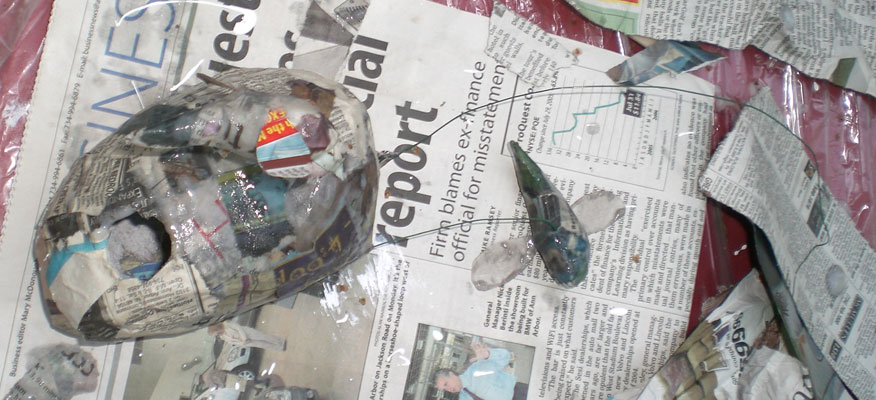
Here are the bees with cereal box wings attached, being paper mached to thin florist wire, which is attached to the bee hive itself. The bee hive is essentially a couple of balled up pages of newspaper, with a sheet of newspaper wrapped around them. Once dry, and with a thick shell, a hole was cut in the hive and the interior balls of paper were removed through this hole, making the whole thing hollow.

Here is the opossum at it's initial priming stage. This was the first animal I began to put together and nearly the last to be completed. Trying to paper mache all of those fingers and toes, none of which was quite an inch long was difficult and tedious, so I was constantly deferring its completion. In the end it was the character I was least happy with, and the one with the most visible errors. Fortunately its placement in the tree, and the fact that it would later be holding a book, masked a lot of the mistakes from view.


No comments:
Post a Comment